
The Campbell Hausfeld Air Compressor repair was made for financial reasons. It would have cost a minimum of $150 to replace this WL6500 series 20 gallon with a similar model. Perhaps the replacement cost would have been even more. I had no idea what the parts would cost, or if I could even find the parts. Luckily, I found the Campbell Hausfeld web site loaded with information and a reference to a parts distributor which happened to be on Amazon.com. Yippee, I was only a few wrench turns away from repairing this air compressor—maybe.
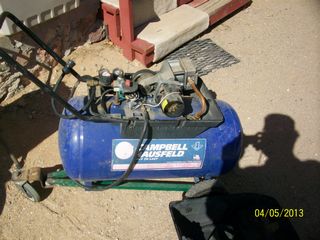 As near as I could determine, this compressor was at least ten years old. It was very, very loud, and it was not compressing any air, what so ever. I checked for leaks in all of the recommended areas, as per the instruction manual that I downloaded from the Campbell Hausfeld site. After determining there were no leaks, it was time to start removing parts. I easily removed the top cover by loosening screws and using a screwdriver to push in some plastic holders. Now I was able to see everything and I did another leak check, but found no leaks.
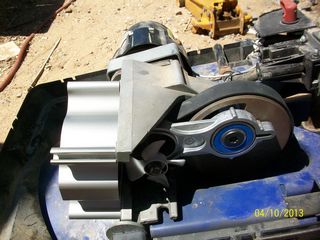
 I then needed to remove the copper tube that was attached at the head and again at the 20 gallon tank. The brass nuts came loose easily, but I noticed the copper fill tube did not have any brass ferrule compression fittings on either end. It did have a soft rubber seal inside each nut, as I later observed. I decided to add an O-ring to each end as an added leak precaution when I later would put it back together. I checked the belt and it was tight, and in good condition. Ok, it is time to remove the cylinder head.
 The cylinder head has four bolts attaching it to the cast aluminum cylinder, and to the electric motor mounting assembly.
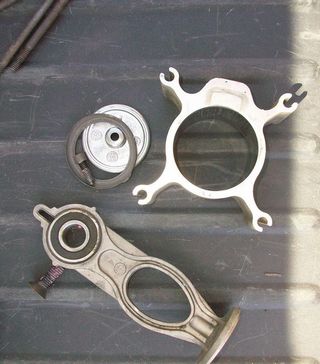
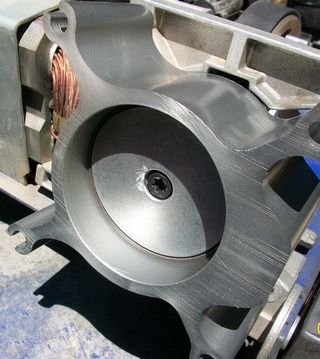
 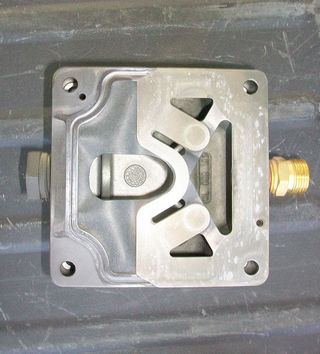 When I loosened these, and they were not as tight as I expected, the whole assembly sort of fell off in my hands. It was then I discovered that the piston ring was partially gone, and the cast aluminum cylinder was scored, as well. This would have definitely caused the tank not to fill. The valves and gaskets looked quite nice, but the cylinder kit I purchased recommended that the valves and gaskets be replaced as well.
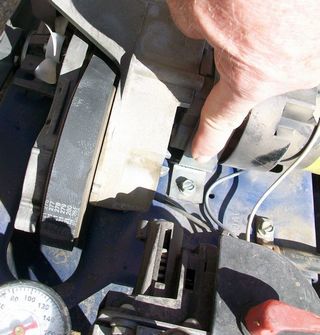 I removed the small fan, thereby, allowing me better piston access, and I also removed the piston bolt at the flywheel. I held the flywheel with a drill bit inserted into a cutout hole. The flywheel nut was torqued to better than 250in. pounds. The instructions did not have torque setting, which was disappointing. I noticed that the motor mount was broken and I would eventually use some metal plumbers tape to repair it. Later I would attempt a weld type repair of the bracket.
 I ordered both the piston repair kit, and the valve repair kit. Together the kits cost $75 including the shipping. I reassembled the compressor piston and head assembly in reverse order and repaired the motor mount. After I was sure everything was tight, being careful not to over tighten the aluminum head bolts, I turned the compressor on. The compressor was now working and the gauges were showing pressure after a few seconds. The machine was much quieter and sounded very good. At 40psi, I could hear a hissing sound, only to find that the copper tube had a hair line fracture. I tried a solder repair, to no avail, so I replaced the tube. My copper tubing skills leave much to be desired even when using a tubing bender.
 Finally I restarted the Campbell Hausfeld Air Compressor and upon it reaching a tad over 100psi, it shut off. I released some air pressure and it automatically restarted at about 85psi. The tool pressure gauge functioned well, as did the on-off switch. I would later go back and replace my make-shift motor mount, check the head bolts, and do a better job on a new copper tube, but for now I had a working air compressor at about half the cost of a new one.
I hope this article helps break ground, if you will, on a similar repair that you may have in the future. As an after thought, always check the pressure tank for rust. Mine was a good one.