
 Why did we decide to put an opening in a block wall? Well, it all began when my wife decided she needed a shorter distance from one room to another (figures). Though I am familiar with frame construction I have done little to none block work. My first thoughts were to call the pros; however, I really thought I could do the job myself. If I followed all the safety precautions, building codes, and did not get hurt, then, if I messed things up I could always call in professional help later.
For now, I decided to let myself put an opening in the 6in. block , non load bearing partition wall.I read all that I could on block construction supporting an opening, and watched as many YouTube and how-to videos that I could find, related to cutting an opening. After watching a few professionals using a wet saw I was almost ready to give up my idea and let someone else do the job. However, there was one video or so, of some person cutting a block wall with a skill saw fitted with a diamond blade. I am familiar with the skill saw, and Home Depot had the diamond blades. I was off to the races now.
 I bought two blades at Home Depot. One was a 7 in. and the other was a 4 in. Both were for wet or dry use. I used the 4 in. on my Black and Decker hand held grinder. The skill saw I used was a Porter Cable with the blade visible on the left side so I was able the see the line I was cutting. I later found that this was not that critical, as the dust made when sawing more than blocked the view of the line. However the saw has a fitting for channeling the sawdust away (dust and block chips in this case) which made a perfect attachment for my ShopVac. I was able to capture a good portion of the dust right at the saw. Still, the ShopVac required emptying often to keep the dust down.
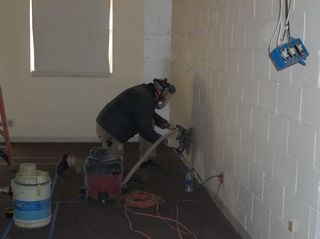
There still was a good amount of dust and I chose to use a respirator and a face shield as added precautions. The respirator is a must if you want to save your lungs and be able to breathe while sawing. I now know why the Pros use a wet saw. So I now had the proper tools assembled, or at least the ones I felt would get the job done and still allow me to keep my health. At this point I decided if these tools did not do the job then, I would be having someone else do it for me.
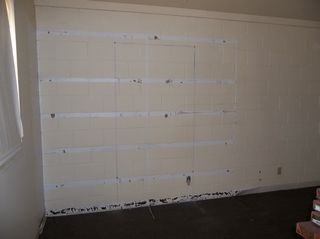
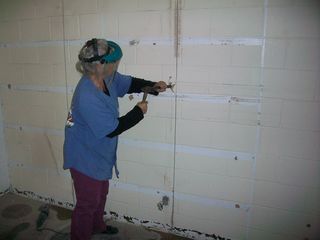
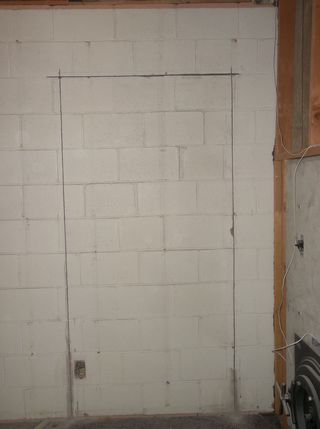 I used a Ryobi rechargeable drill that has a built in level on its top along with an 8 in. masonry drill bit. I drilled the top holes (at each top corner the framing size for an opening of a 36 in. wide door) completely through the block to its other side. Drill bits come in different lengths and the 8 in. one was perfect for the 6 in. block. I used the level on the drill to keep the holes straight, and I just eyeballed the perpendicular right, left. I then snapped chalk lines, on both sides of the wall. I would be adding the framing support for the door using 2 x 6 in. lumber.
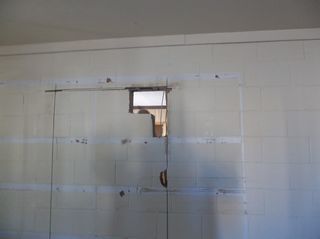
The chalk lines were cut on both sides as the saw blade is shallow, but deep enough to reach through the block to its hollow center. I 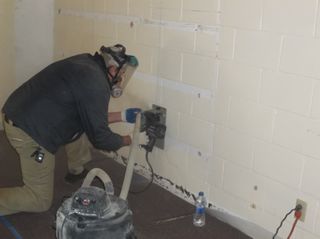 originally adjusted the blade for an even shallower cut. As I became more familiar with its use I reset it for the deepest setting. I might add that cutting through the mortar joints was much easier than cutting the solid block.
After I finished cutting the opening I made another cut above the doorway on each side. The cut extended 6 in. on each side at the top. This was to allow a metal support to be added for strength above the doorway and to allow me to re-rout an electrical outlet. Code calls for 6 in. metal or a pressure treated concrete piece. I believe Home Depot has the concrete piece.
 The doorway was now cut and it was time to remove the block. I found that by using a hammer and a chisel that I, oops,( me and my wife), were able to chip out enough mortar to loosen the block. Then I used a block of wood and the hammer to finish loosening the blocks to the point where I could remove them. When all of the blocks had been removed, I found I was left with some solid and some hollow blocks on the side and top. I placed 2×4 lengths in the hollow openings, and anchored them with foam and a concrete patching material, and Tapcon screws where possible.
Finally I placed in my metal supports and attached the 2×6 wood frame to the block using Tapcon concrete screws. In addition, I attached the door frame to the wood using 2 1/2 galvanized wood screws. I finished up with mortar around the sides and silicone caulking in the wood 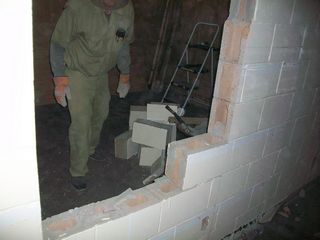
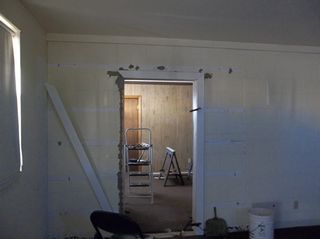 seams.
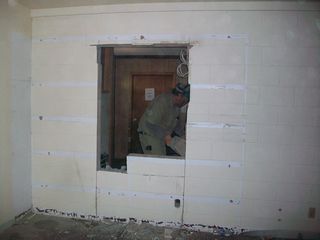
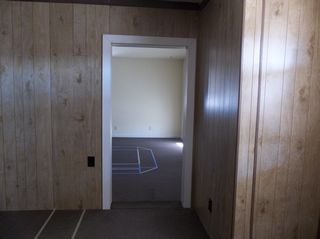 We both were happy with the new opening and quite pleased that we had done the job ourselves.