
Chevy HHR Fuse Box Removal
Well, my 2006 Chevy HHR was acting strange so I decided to remove the fuse box. I only did this after searching for answers as to why the gauges would suddenly, at random times, decide to bounce from low to high readings. Error lights would light up from various systems such as the power steering, and theft control. The transmission would go into what I believe was some sort of limp mode as well. In addition, the key could be turned off and then the car restarted as if nothing had ever happened. However, when the day came that this “possum” of a car decided to give my wife an intermittent start condition, I decided to do something.
Intermittent Problems
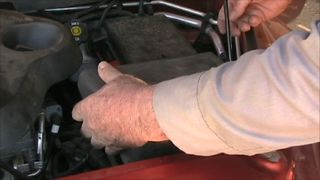
In trying to duplicate the same problem that my wife experienced, I tried jiggling the wires going to the modules under the hood. I was then able to start the car. I suspected the module connections. Although, on closer inspection of the cable connections I decided to check the fuse box. After all, so many different systems were intermittent that even the body control module and ignition switch could be suspect. However, they were inside the cab, not under the hood. Therefore, I set my sights on all the fuses and relays.
Taking Things Apart
 I first began by removing the cover over the two control modules (system, transmission). Then I removed the battery box cover. I noticed
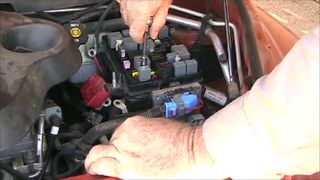 four bolts and loosened them. In doing so, I found one loose, and another not tightened down at all. Perhaps this was the cause of all my headaches. In loosening the bolts I found that I was unable to remove them completely. They are designed to stay with the box.
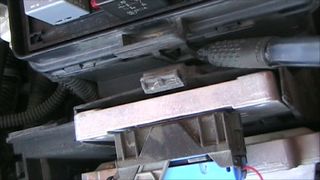 Having made sure the bolts were completely loose, I then pried back five plastic hold-down side clips. These clips held the top of the box to the bottom and enabled me to loosen the box top enough to realize that the two battery positive cables (one for jump starting) needed
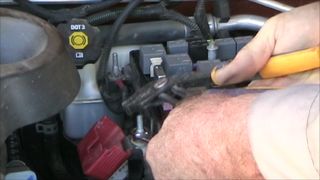 to be removed as well. With the battery cabled removed, I was able to lift the top of the box off and away from the engine.
Cleaning The Box
I took this part inside and cleaned its 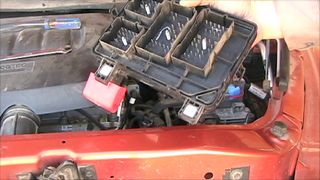 terminals with rubbing alcohol, and then applied dielectric grease sparingly to the terminals. In retrospect, I would not use dielectric grease. I would just leave them as cleaned with the rubbing alcohol. I was hoping the grease would keep the dust away from the contacts. Next, I replaced the newly lubricated top cover over the bottom half of the box.
I pushed it down until I 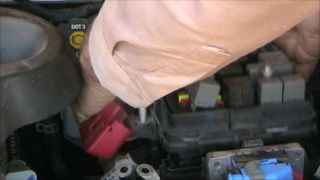 was certain that it was firmly in its proper place. It surprised me to the ease of which it pushed down as compared to the effort involved in its removal. I suppose the dielectric grease made it slide in much better. Now it was time to tighten the bolts.
Putting It Back Together
The four hold down bolts make a popping noise as I tighten them. I tightened them in an alternating pattern starting with the center one. In tightening, I would reach a point where the bolt would just begin to get tight and then a “pop” sound would occur and the bolt would be less tight. This would happen I believe at least twice to each bolt before it would become totally tight. I made sure to get all bolts good and tight. I re-attached the battery cables to the box and made sure all the relays and fuses were pushed in tight.
Finally I attached the battery cable to the battery by the spare tire and started the engine. “Possum” as I now call it, started right up with no lights showing except the gate ajar and door ajar which was normal as they were open. I shut the engine off, put the covers on the battery box and modules, and called it a day. I have had no more issues of intermittent lights for 329 miles now. Mileage is 62,766 as of October 5, 2013. Good Luck on your repairs!