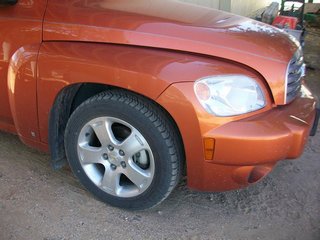
NOTE: Should you be unable to open the Chevy HHR rear hatch due to a dead battery, there is a positive jump terminal under the hood.
TOOLS AND MORE I USE…https://amazon.com/shop/carstrucksanddetours
50+ Chevy HHR Videos…Link…https://www.youtube.com/watch?v=4Car40mMDCE&list=PL5q1n3MQ9IDsI_gIzoZW8FgNKU_UQt3th
 This is a follow-up article for Chevy HHR Battery Replacement video that is on YouTube. The camera operator seemed to have left out some audio and a few steps in Chevy HHR battery replacement video. Therefore, the following text will reinforce what is already in the video, and replace those obvious, but missing steps. Note: Do not close the rear hatch without the battery installed. It will lock and not unlock! Replacing the battery is not a difficult task, but it is one that requires a few safety precautions.
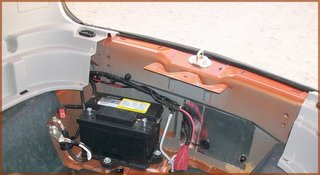
BATTERY IN THE BACK
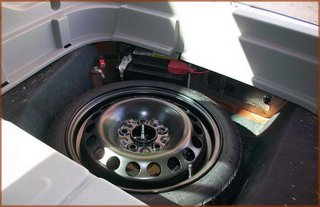
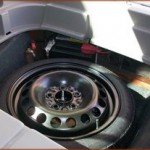
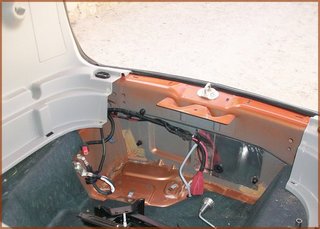
To begin with, the Chevy HHR battery is located in the back, under the spare tire. I needed to remove the back mat, the plastic bed panel, and another plastic panel with a hand tightened nut, just above the spare tire in order to even see the battery. I then, following safety precautions, removed the battery cable from the negative side of the battery. This takes the battery completely out of the system at the onset, thus there is a lesser chance of a short from the tire or tools.
 After removing the negative terminal cable, I then removed the spare tire. Before I put the tire back I checked the air pressure in it. Moving on, I then removed the battery vent tube. It is a small tube that just plugs into the battery’s side. It is designed to vent off flammable gas from the battery to the outside of the vehicle. This tube should be replaced if it is missing or broken.
BATTERY SAFETY
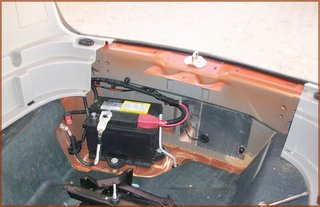
The positive side of the battery is covered with a protective red rubber-like cap. This is another safety feature designed to stop a spark situation, should something metal touch it and the negative side of the battery. Remember that the car body is negative . In loosening the positive cable in the video, my wrench hit the body a few times. I did not make any sparks because I removed the negative battery cable previously.
 Sparks or open flames around batteries can cause the battery to explode—not good. I pulled the cover back and removed the positive battery cable. Both the positive and negative cables take a 10mm socket to remove their nuts. Having done that, I pulled the vent tube from the Chevy HHR battery and positioned it out of harm’s way. The top of the battery is now completely disconnected from everything.
REMOVING THE CLAMPS
Now it is time to remove the battery hold-down clamps at the bottom front and positive side of the battery. These clamps have a bolt that takes a 14mm socket to remove. I loosened the bolts and slid the clamps back (as they are designed to do), but they were quite tight around the bolts. In addition, the car steel body was molded in such a way that it would be difficult to slide the clamps away from the battery. I therefore just removed the bolt and clamp together as one.
 The battery was now completely loose and ready for removal. It is actually light enough to just grab hold of, but I used a battery strap for added security. The Chevy HHR Shop Manual states “not to tip the battery more than 40 degrees,” and so I did not. Now it is time to put in the new one.
INSTALL THE NEW BATTERY
The new Chevy HHR battery I purchased was an exact replacement. It has a rating of 600 cold cranking amps and 100 reserve cranking. Mine came with a 30 month non-prorated replacement, from the Chevy dealership. There most likely are better batteries available at retail outlets, but I liked the service I got from the old one. I hope the new one will perform as well.
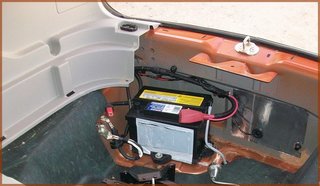 As I mentioned earlier the YouTube video failed to mention a few things. After I installed the new battery, I retraced my steps in reverse order, hooking up the hold down clamps, positive cable, and vent tube. I then installed the spare tire, and tightened the negative cable to the negative battery post. Before I put the plastic flooring back I started the car, just to make sure the battery worked ok. Everything was fine and I put the flooring and carpeting back. All in all, this was not a difficult job. You can do it!